
Installing Additional Memory
Your computer has two memory slots that you access by removing the bottom case.
Your MacBook comes with a minimum of 2 gigabytes (GB) of 1066 MHz Double Data
Rate (DDR3) Synchronous Dynamic Random-Access Memory (SDRAM) installed. Both
memory slots can accept an SDRAM module that meets the following specifications:
 Double Data Rate Small Outline Dual Inline Memory Module (DDR3) format
 30 mm (1.18 inches)
 204-pin
 1 GB or 2 GB
 PC3-8500 DDR3 SO-DIMM 1066 MHz Type RAM
You can add two 2 GB memory modules for a maximum of 4 GB of memory. For
best performance, fill both memory slots and install an identical memory module
in each slot.
To install memory in your MacBook:
1
Follow steps 1 through 3 beginning on page 37.
Important:
When you remove the bottom case, you expose sensitive internal
components. Avoid touching anything other than the memory assembly when you
remove or add memory.
Chapter 3
Boost Your MacBook
47
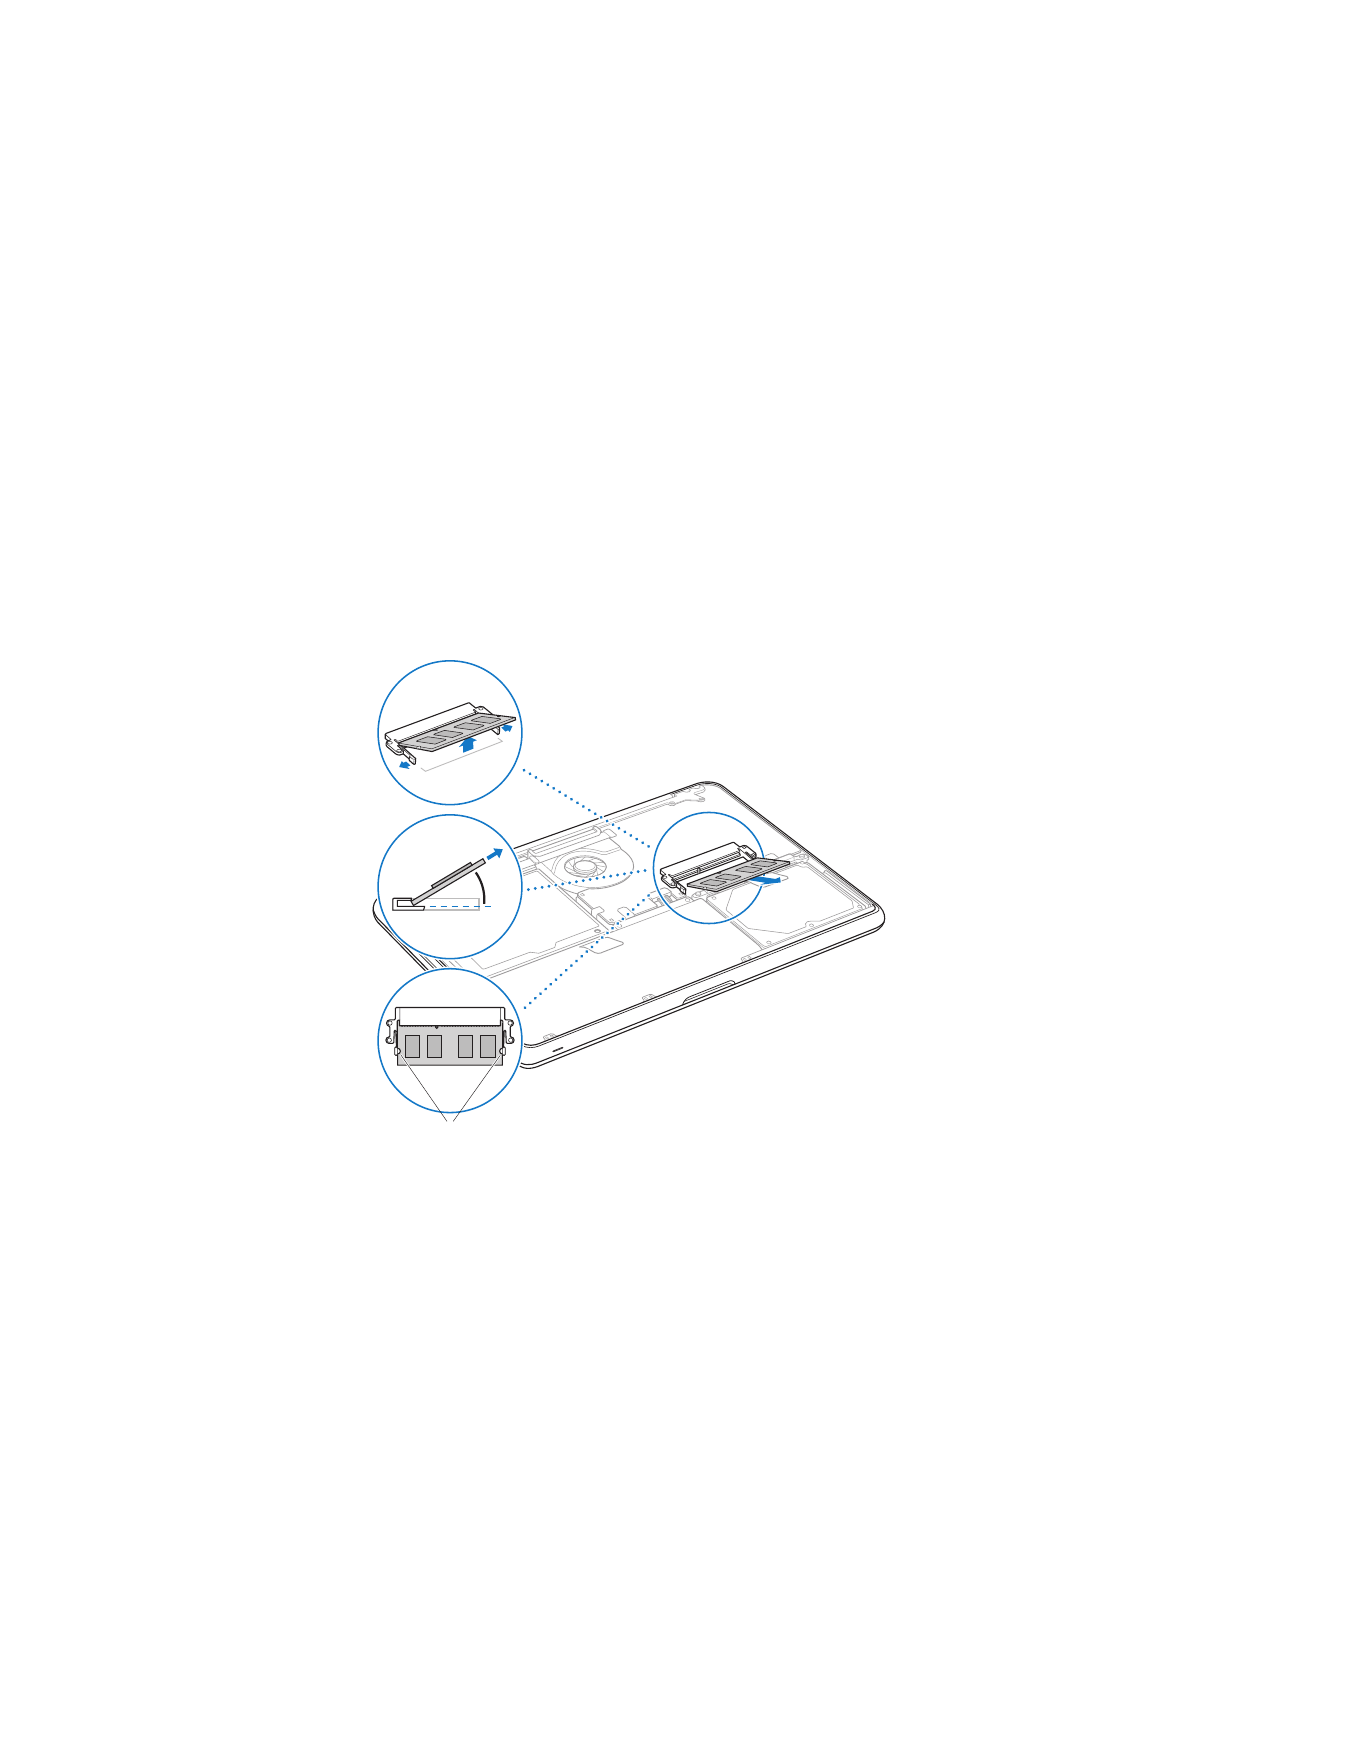
2
Push the levers on the sides of the memory module in an outward direction to release
the module from the memory card slot.
The memory pops up at an angle. Before removing it, make sure you see the half-circle
notches. If you don’t, try pushing the levers outward again.
Notches

48
Chapter 3
Boost Your MacBook
3
Hold the memory module by its notches and remove it from the slot.
4
Remove the other memory module.
Important:
Hold the memory modules by their edges, and do not touch the gold
connectors.
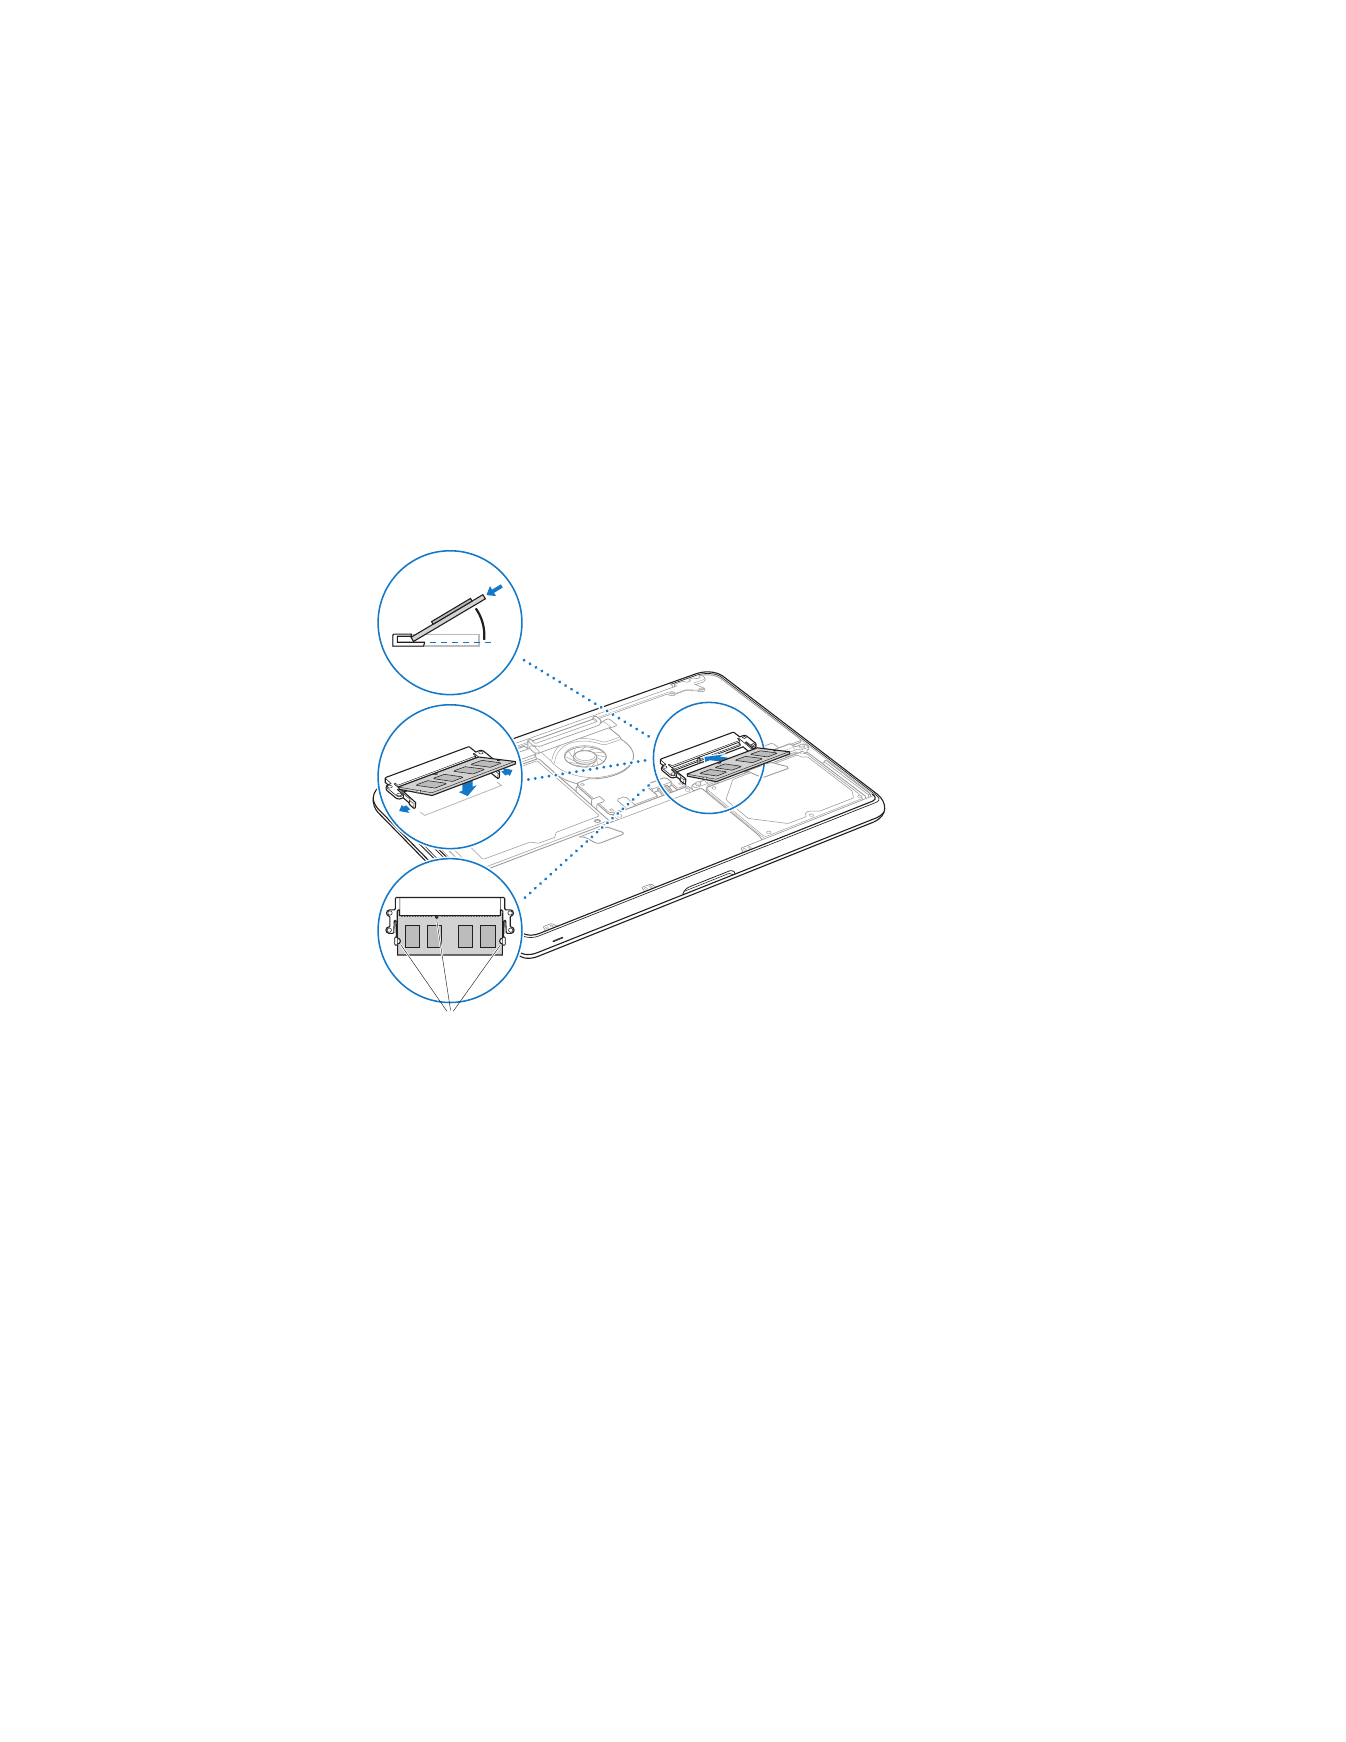
5
Insert the new memory module in the slot:
a
Align the notch on the gold edge of the module with the notch in the lower
memory slot.
b
Tilt the card and push the memory into the slot.
c
Use two fingers with firm, even pressure to push down on the memory module.
You should hear a click when the memory is inserted correctly.
d
Repeat to install an additional memory module in the top slot. Press down on the
module to make sure it is level.
Chapter 3
Boost Your MacBook
49
Follow the instructions for replacing the bottom case in steps 10 and 11 on page 44 and
page 45.
Notches

50
Chapter 3
Boost Your MacBook